Nail art has come such a long way, and there are a ton of techniques to get those digits looking downright fabulous. So grab your polish and tools, and let’s go through the list!
Stamping: Using a rubber stamp to transfer designs onto your nails. Super cool and pretty easy once you get the hang of it!

Water Marbling: You drip nail polish into water, swirl the colors, and then dip your nails in to get a marbled effect. It’s kinda messy but SO worth it.

Ombre/Gradient: Blend two or more colors together to create a smooth transition. You usually use a sponge for this one.

Dotting: Simple but effective. Use a dotting tool (or even the tip of a bobby pin) to create patterns or designs.

Striping: Thin, straight lines that you can lay down with a striping brush or striping tape. So many pattern options!

Hand-Painting: This one’s for the artists out there. You can use a tiny brush to paint intricate designs.

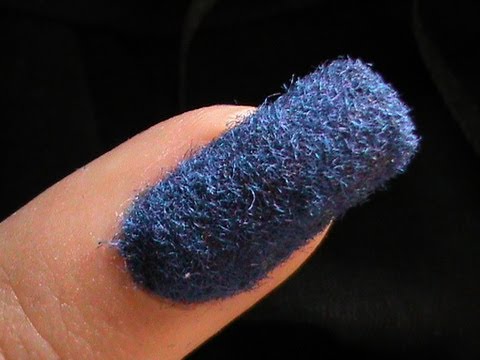
Flocking: This involves applying a velvety powder onto wet polish for a textured, fuzzy finish.
Sponging: Use a sponge to dab on layers of color or texture. Great for creating a speckled or gradient look.

Decals/Stickers: Pre-made designs you can stick onto your nails. There’s a decal for everything, trust me.

Chrome/Mirror Effect: Using a special powder to give your nails a metallic, reflective finish.
Nail Piercing: Yup, you can actually pierce a small hole through the tip of your (acrylic) nail and add a tiny hoop or charm.
Rhinestones and Gems: Glue ’em on for some bling-bling!

Acrylic 3D Art: Creating 3D shapes or figures on the nails using colored acrylic. Not for the faint of heart, but the results can be amazing.

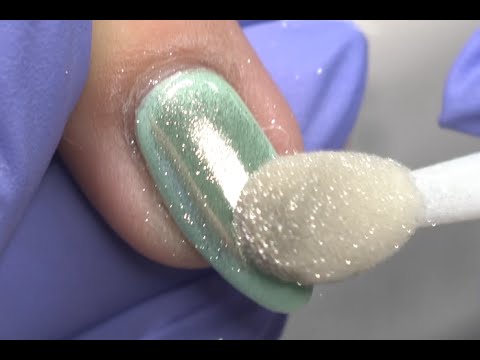
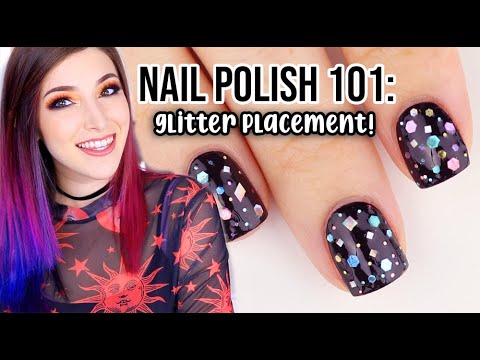
Glitter Placement: Placing individual pieces of glitter onto the nail to create a specific pattern or design.
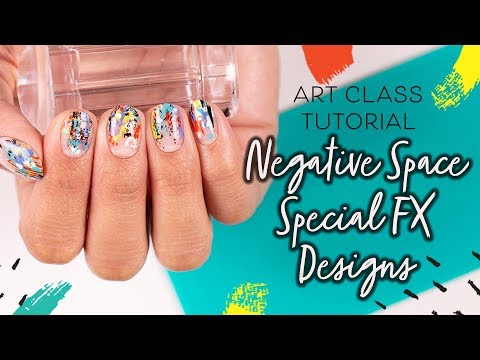
Negative Space: Leaving parts of the nail unpainted while creating designs around it.
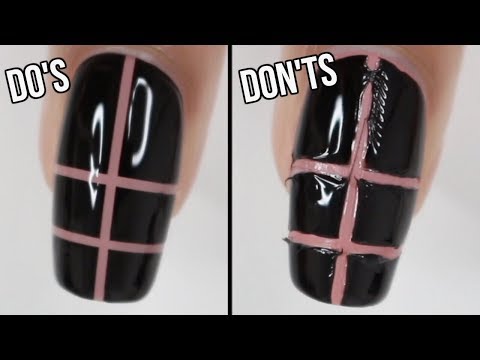
Taping: Using tape to block off areas of the nail to create sharp, geometric designs.
Matte Finish: Using a matte topcoat to give your design a flat, non-shiny finish.

Quilted Nails: Creating a crosshatch pattern that makes the nail look quilted. You usually use striping tape for this.

Holographic Nails: Special holographic polish or powder that gives your nails that ultra-reflective, rainbow sheen.

Airbrushing: Typically done by pros, airbrush machines spray on intricate designs super quickly.

French Tips with a Twist: Classic French tips but with added designs, colors, or embellishments.

Foil Transfer: Applying foil over adhesive to create a metallic or patterned effect.
